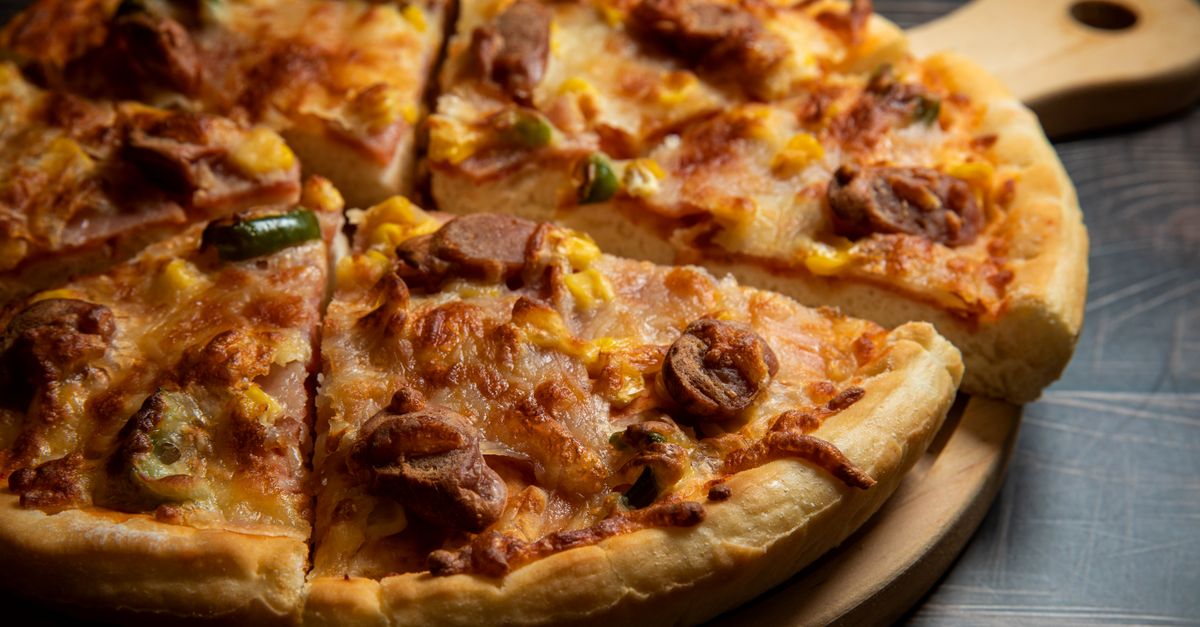
Why Your Homemade Pizza Crust Isn't Crispy (And The Pro Secrets That Deliver Pizzeria-Quality Crunch Every Time)
You’ve spent time kneading the dough, carefully spread the sauce, and loaded your pizza with your favorite toppings, envisioning that perfect crispy bite. But when it emerges from the oven, instead of a satisfying crackle, you get a soft, chewy, or even worse—soggy—crust. Sound familiar? I’ve been there more times than I care to admit. For years, my homemade pizzas were delicious, but the crust was always the weakest link. It lacked that quintessential crunch, the structural integrity that makes a great pizza truly sing.
I used to think it was just my home oven, or maybe I wasn’t kneading enough, or perhaps too much. I tried every recipe, every type of flour, every yeast under the sun. Nothing consistently delivered that elusive crisp. It felt like a culinary conspiracy designed to keep true pizzeria quality out of my home kitchen. But after countless experiments (and a few pizza-related catastrophes), I uncovered the real culprits behind the non-crispy crust, and the surprising, often overlooked techniques that changed my pizza game forever. It’s not just about the recipe; it’s about technique, timing, and a few simple tools that make all the difference.
Key Takeaways
- High heat and a preheated baking surface are crucial for an immediate, aggressive crisp.
- Dough hydration and proper gluten development directly impact crust texture and crispness.
- Avoid overloading your pizza with wet ingredients to prevent a soggy bottom.
- Strategic use of fats and specific baking techniques can enhance crunch without drying out the crust.
- Understanding your oven’s nuances and utilizing tools like pizza stones or steels can elevate your results.
The Low Heat, Cold Surface Blunder: Why Most Home Ovens Fail the First Bite
This is, hands down, the single biggest mistake I see home pizza makers make, and it took me an embarrassingly long time to correct it myself. You might think 450°F (230°C) for 10-15 minutes is sufficient. It’s not. Most home ovens simply can’t achieve the intense, radiating heat of a commercial pizza oven that cooks a pie in 90 seconds. To compensate for this thermal deficit and achieve a truly crispy crust, you need to push your oven to its absolute maximum, and critically, preheat your baking surface thoroughly.
Think about a professional pizzeria. They’re cooking pizzas in ovens that reach 700-1000°F (370-540°C). This extreme heat isn’t just for speed; it’s for crispness. When the raw dough hits that superheated surface, it experiences an immediate, explosive burst of oven spring and begins to crisp instantly, forming a barrier against moisture. In a home oven, if your surface isn’t scorching hot, the dough slowly warms up, absorbing moisture from the toppings, and essentially steaming instead of baking.
What Actually Works:
- Crank it to the Max: Preheat your oven to its highest possible temperature, usually
500-550°F (260-290°C). Don’t rely on the oven’s preheat beep; it only tells you the air temperature, not your baking surface. - Invest in a Pizza Stone or Steel: A pizza stone is good, but a pizza steel is truly a game-changer. Steel conducts heat far more efficiently than stone, providing an even more intense thermal shock to your dough. Mine is
1/4 inch (6.35 mm)thick, and it’s made all the difference. This isn’t an optional accessory for crispy crust; it’s essential. - Extended Preheat Time: Place your stone or steel on the middle or top rack (depending on your oven’s hot spots – experiment!) and preheat for at least
45 minutes to an hour, or even90 minutesfor a steel. I usually start my oven preheating right after I finish my dough’s final proof, which gives it plenty of time. - The Launch: When it’s time to bake, carefully transfer your pizza directly onto the scorching hot surface using a lightly floured or semolina-dusted pizza peel. The immediate sizzle is what you’re looking for.
This aggressive initial heat is what jumpstarts the Maillard reaction on the crust, creating that irresistible golden-brown color and, most importantly, the foundational crispness that lasts.
The Dough Hydration Paradox: Too Wet, Too Dry, or Just Right?
I used to obsess over the perfect pizza dough recipe, constantly tweaking the water-to-flour ratio. My initial thought was, ‘less water, crisper crust!’ It seemed logical. Drier dough, less moisture to evaporate, right? Wrong. A dough that’s too dry becomes dense and cracker-like, often burning before it truly crisps, or it ends up tough. On the flip side, a dough that’s too wet can be difficult to handle and leads to a soggy interior that struggles to dry out.
The real secret lies in striking a balance. You need enough hydration for good gluten development, which creates an airy, open crumb, but not so much that the crust can’t properly dry out and crisp up. The type of flour also plays a significant role here.
What Actually Works:
- Aim for 60-65% Hydration: For a home oven, I’ve found that a hydration level of
60-65%(water weight as a percentage of flour weight) is ideal. This provides enough moisture for a supple, extensible dough that develops a good structure, but still allows it to crisp aggressively. I measure my ingredients by weight, not volume, for consistent results. - Strong Flour is Your Friend: Use a high-protein bread flour (around
12-14%protein). The higher protein content means more gluten, which creates the structure that traps air, resulting in a lighter, chewier interior and a better canvas for a crispy exterior. All-purpose flour often lacks the strength for that perfect crust. - Proper Kneading & Fermentation: Don’t skimp on kneading (aim for
10-15 minutesin a stand mixer, or15-20 minutesby hand, until the dough passes the windowpane test). This develops the gluten. Equally important is a slow, cold fermentation (24-72 hours in the fridge). This allows enzymes to break down starches, developing complex flavors and making the dough more extensible and easier to crisp. - Gentle Handling: Once the dough is fermented, handle it gently when shaping to preserve those precious air bubbles. Don’t roll it with a rolling pin; stretch it by hand, pushing the air to the crust. This creates the puffy, airy
cornicione(edge crust) that crisps so beautifully.
Getting the dough right is foundational. It sets the stage for everything else, giving you a crust that’s both tender and ready to crunch.
The Topping Tsunami: Less is More for a Crispy Bottom
This was another hard lesson learned. I love toppings, and I used to pile them on with abandon, believing more was always better. The result? A perfectly cooked, crispy top, but a disappointingly pale, soft, or downright soggy bottom. The issue is simple: moisture. Every topping, from sauce to cheese to vegetables, contains water. When you overload the pizza, all that moisture has nowhere to go but down, steaming the crust from below.
Even if you nail the high heat and dough, an over-topped pizza is destined for sogginess. I’ve seen this countless times, and it’s a waste of perfectly good effort. My rule of thumb now is to think of toppings as accents, not the main event. The crust is the star, and you don’t want to drown it.
What Actually Works:
- Light Hand with Sauce: Use a minimal amount of sauce. Too much sauce not only adds moisture but also cools the dough, hindering crisping. A thin, even layer is all you need. Consider reducing your sauce slightly beforehand to remove excess water, or opt for a less watery style.
- Drain Wet Ingredients: If using fresh mozzarella, pat it dry thoroughly with paper towels before placing it on the pizza. For vegetables like mushrooms, spinach, or bell peppers, sauté them briefly beforehand to remove excess moisture. This not only prevents sogginess but also concentrates their flavor.
- Sparse Cheese Layer: While cheese is delicious, too much can create a heavy, dense layer that traps steam. A moderate amount of low-moisture mozzarella (like a block shredded yourself, not pre-shredded, which often contains anti-caking agents) is usually best. Consider finishing with a sprinkle of harder cheeses like Parmesan post-bake for flavor without the added moisture.
- Strategic Topping Placement: Keep wetter, heavier toppings away from the very center of the pizza and closer to the edges. This gives the center crust a better chance to cook through and crisp.
Once I embraced the ‘less is more’ philosophy with toppings, my pizza crusts improved dramatically. It allows the beautiful dough to shine through and get the heat it needs.
The Overlooked Fat Factor: Oil for Crispness, Not Just Flavor
For a long time, I thought olive oil was purely for flavor and to prevent sticking. While it certainly does both, its role in achieving a crispy crust is more significant than I initially realized. A small amount of fat in the dough, and strategically applied, can dramatically improve the crust’s texture, helping it crisp up more evenly and brown beautifully.
Fat works by interfering with gluten development slightly, making the dough more tender. More importantly, it acts as a heat conductor on the surface of the dough, promoting browning and crispness. The key is knowing how much and when to apply it.
What Actually Works:
- A Touch of Oil in the Dough: Incorporate
1-2 tablespoonsof extra virgin olive oil per500g (about 1 lb)of flour into your dough recipe. This small amount makes the crust more tender and promotes browning, contributing to a crisper exterior. - Brush the Edges: Just before baking, lightly brush the exposed
cornicione(the edge crust) with a little olive oil. This is a pro trick that helps it brown and crisp beautifully. You’ll get that appealing golden-brown color and a lovely textural contrast. - Avoid Oiling the Bottom Directly: While oil helps the dough not stick to a metal pan, you’re ideally launching directly onto a dry, preheated stone or steel. Adding oil directly to the bottom of the raw dough before placing it on the stone can actually create a barrier that prevents the aggressive heat transfer needed for initial crisping. If you must use a pan, a very light spray of non-stick oil is enough.
- Consider an Air Fryer for Reheating (Controversial, But Effective): While not for initial baking, if you have leftover pizza, reheating it in an air fryer at
350-375°F (175-190°C)for3-5 minutes(until cheese is bubbly and crust is revived) is a revelation for crispness. The circulating hot air does wonders for making it taste fresh out of the oven, often even crisper.
Embracing fat strategically for crispness, rather than just flavor or non-stick properties, was another small adjustment that yielded big results.
The Steam Trap & Moisture Lock: How to Fight the Soggy Enemy
Even if you’ve done everything right so far—high heat, perfect dough, sparse toppings, strategic oil—your pizza can still fall victim to post-bake sogginess if you don’t manage residual moisture. The moment a pizza comes out of the oven, it’s still very hot, and steam is escaping. If you immediately transfer it to a flat plate or cutting board, that steam gets trapped underneath, condensing back into water and making your beautiful crispy bottom soggy in minutes.
This is especially true if you let the pizza sit for a few minutes before slicing. It’s a subtle but critical detail that separates a truly crispy pizza from one that starts crispy but quickly loses its magic.
What Actually Works:
- Elevate for Airflow: As soon as the pizza comes out of the oven, slide it off the stone/steel and onto a wire cooling rack. This allows air to circulate underneath the crust, letting any residual steam escape and preventing condensation. Let it rest for
2-3 minuteshere before slicing. - Immediate Slicing (with a Rocker!): Once rested on the rack, transfer to a cutting board and slice immediately. Waiting too long allows the cheese and toppings to set too much, making it harder to cut and potentially tearing the crust. I highly recommend a pizza rocker (a mezzaluna-style knife); it slices through with ease without dragging toppings or compressing the crust like a wheel cutter can.
- Serve Promptly: Pizza is best enjoyed immediately. The longer it sits, the more moisture from the toppings (even drained ones) will inevitably begin to migrate into the crust. Embrace the fleeting moment of peak crispness!
These small post-bake steps are the final fortifications against the soggy enemy, ensuring your hard work results in a lasting, satisfying crunch.
Troubleshooting Your Oven: Hot Spots and the Broiler Boost
Despite all the best techniques, every home oven is a unique beast with its own quirks, hot spots, and limitations. I quickly realized that simply setting my oven to 550°F (290°C) and walking away wasn’t enough; I needed to understand how my oven behaved. Some ovens run hotter in the back, some in the front, and some have a significantly stronger top heating element (the broiler) than bottom. Ignoring these nuances is like trying to navigate a new city without a map.
My pizzas used to come out with one side beautifully browned and the other pale, or with a perfectly cooked top but an anemic bottom. It was frustrating until I started actively observing and adapting to my oven’s specific characteristics.
What Actually Works:
- Map Your Hot Spots: Pay attention to how your pizza browns. Does one side cook faster? Does the crust crisp more on one end? Rotate your pizza halfway through baking if needed. My oven is hotter in the back, so I always position the dough with the thicker
cornicionethere initially. - The Broiler Boost (Use with Caution!): If your crust isn’t browning enough on top, or if you want an extra bubbly, slightly charred
cornicione, engage the broiler for the last30-60 secondsof baking. This is a powerful technique but requires constant vigilance. Never walk away from your oven with the broiler on while pizza is inside. It can go from perfect to burnt in seconds. - Consider an Oven Thermometer: Don’t trust your oven’s built-in thermometer. They are notoriously inaccurate. An inexpensive oven thermometer will give you a true reading of your oven’s internal temperature, allowing you to calibrate your settings more precisely. I found my oven was
25°F (14°C)cooler than it indicated. - Adjust Rack Position: Experiment with different rack positions. For a crispier bottom, I typically start with the stone/steel on the middle rack. If my top isn’t browning enough, I might briefly move it to the top rack for the last minute (with the broiler on, carefully) or start it slightly higher next time.
Learning to work with your oven, rather than against it, is the final piece of the puzzle for consistently crispy, perfectly cooked homemade pizza.
Frequently Asked Questions
Q: Can I get a crispy crust without a pizza stone or steel?
A: It’s significantly harder, but not impossible. If you don’t have a stone or steel, preheat your oven to its highest setting with a heavy-duty baking sheet or cast iron pan upside down for at least 30-45 minutes. The goal is to create a hot, flat surface for the dough to hit. However, a stone or steel will yield much better results due to their superior heat retention and conduction.
Q: Why is my pizza crust tough instead of crispy and airy?
A: A tough crust often indicates insufficient gluten development or too little hydration. Ensure you’re kneading your dough long enough (it should be smooth and elastic, passing the windowpane test). Also, check your hydration; 60-65% is generally good for home ovens. Overworking the dough during shaping can also lead to toughness.
Q: My pizza base is still raw/soggy in the middle, even if the edges are crispy. What gives?
A: This is typically due to one or a combination of: a baking surface that isn’t hot enough, an oven temperature that’s too low, or overloading your pizza with too many wet toppings. The center of the pizza needs to cook through and dry out just as much as the edges. Review your preheating time, oven temperature, and topping quantity.
Q: Should I use cornmeal or flour on my pizza peel?
A: Both work, but I prefer semolina flour. It has a coarser texture than regular flour, acting like tiny ball bearings that help the pizza slide off the peel onto the hot stone/steel more easily. Use sparingly; too much can burn and taste bitter.
Q: How do I prevent my pizza from sticking to the peel?
A: Work quickly and efficiently. Stretch your dough, place it on a lightly floured or semolina-dusted peel, add your minimal toppings, and launch immediately. The longer the raw dough sits on the peel with toppings, the more moisture it absorbs, making it stick. Give the peel a gentle shake to ensure the pizza moves freely before sliding it into the oven.
Conclusion
Achieving that elusive pizzeria-quality crispy crust at home isn’t some mystical art; it’s a science of understanding heat, moisture, and dough. By cranking up the heat, thoroughly preheating your baking surface, mastering dough hydration, being judicious with toppings, and leveraging a few simple pro tricks, you can transform your homemade pizza from good to extraordinary.
It took me years to truly understand these nuances, but applying them has elevated my pizza nights to a whole new level. The next time you’re craving that perfect crunch, don’t just follow a recipe; embrace these techniques. Your taste buds—and your guests—will thank you. Now go forth and conquer that crispy crust! Experiment with one of these tips tonight and see the difference.
Written by Ben Carter
DIY Projects & Renovations
A passionate woodworker and renovator, Ben shares practical DIY solutions for every corner of the home.
You Might Also Like

Why Your DIY Home Security System Feels Gimmicky (And What Actually Works for Real Peace of Mind)
Discover why many DIY home security systems disappoint and learn what truly makes a system effective for genuine peace of mind, not just gadgets.

Why Your DIY Paint Job Peels (And The Pro Prep Secrets That Make It Last)
Frustrated with peeling paint? Discover the hidden reasons DIY paint jobs fail and learn professional prep secrets for a lasting, flawless finish.
Why Your DIY Home Security System Feels Gimmicky (And What Actually Works for Real Peace of Mind)
Discover why basic DIY home security often falls short and learn the layered approach to building a truly effective system for genuine peace of mind.